We’ve all been there. You spend hours on your masterpiece – planning, scooping out messy pumpkin guts, carving away carefully. Finally, you add a candle, turn off the lights, and enjoy your amazing jack-o-lantern. Now you want to save it for posterity in a picture, and also share it online with your friends and family. But the photo you take ends up a blurry, dark mess, and no matter what you do, you can’t capture the awesomeness of your pumpkin…
Here’s how to get the great Halloween pumpkin photo you’ve been dreaming of!
We’ve been photographing pumpkins for our company’s annual pumpkin carving contest for years, and we’ve tried lots of things. You don’t need a fancy set-up, but there are some must-haves:
- A tripod (Any kind will do, even a stack of steady books.)
- Some soft lighting
- Glow Sticks
- Lots of battery-operated tea-lights and/or specialty pumpkin lights (strobe lighting, colored lights)
- A helper (optional)
- Any old camera you’ve got! (Check out the note at the end, if you’ll be using your phone’s built-in camera.)
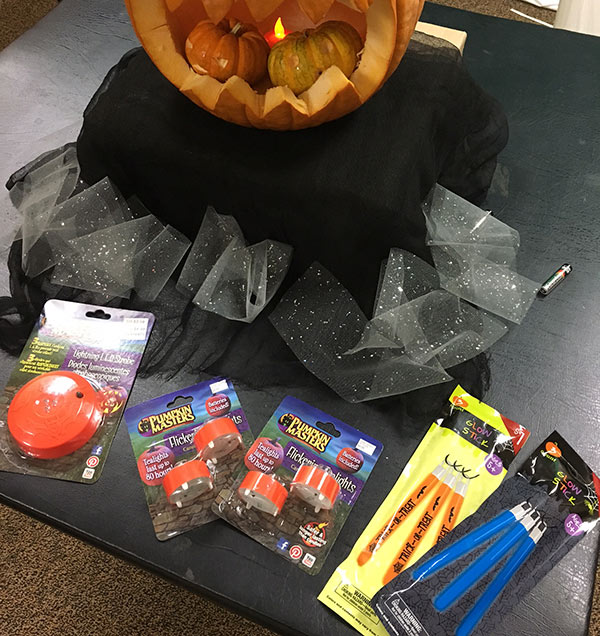
Our pumpkin photo shoot supplies
Light is your friend!
This is counter-intuitive, I know, because we’re talking about taking a “night time” photo. But light is what allows us to see all of the incredible details of your pumpkin. We need 2 types of light, and they are both very important:
- Lantern light, or the “flame” light coming from your pumpkin, that will show off your great carving
- Ambient and shadow light, that will help us see the shape and depth of the whole pumpkin
Without strong enough lantern light, your photo just looks like a carved pumpkin instead of a jack-o-lantern glowing on a moonless Halloween night… Without good ambient lighting, your photo will look like a red, blurry mess in a field of grainy black background.
Light your pumpkin well
Great lantern light can be achieved by using more than one light source! Don’t just rely on a single, old-fashioned candle. Instead, load up the interior of your pumpkin until it glows. We like to add at least a couple of battery-powered, flickering tea lights along with some orange glow sticks.
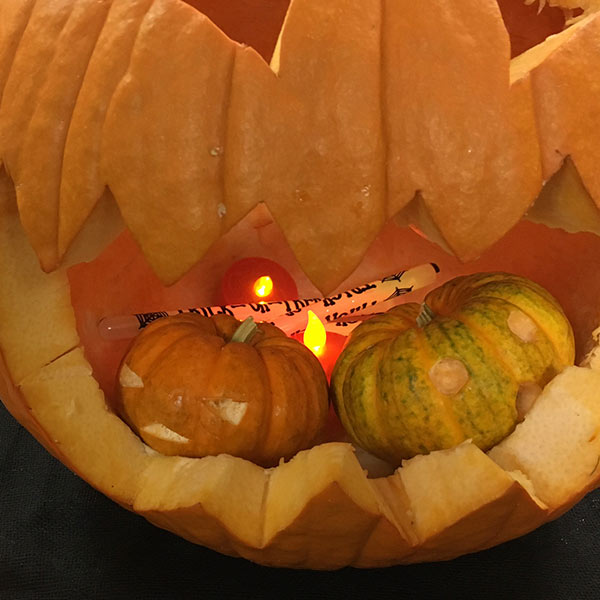
We added 2 tea lights and 3 cheap glow sticks to this pumpkin
If your pumpkin has a carving on the back as well (meant to cast a shadow), consider adding a small LED flashlight aimed directly at the back carving for a strong, concentrated light source. You can even use your phone’s flashlight (assuming you’re not using it to take the picture!).
Feel free to play around with tea light and glow stick colors. Depending on the theme of your carving, you can get some great effects with green, purple, or hot pink lighting coming from inside your pumpkin!
Light your room well
For great ambient lighting, you’ll want to take your picture in a room with no windows, so you can completely control the light. Place a soft lamp somewhere behind and to the side of your pumpkin, preferably at the same height or lower.
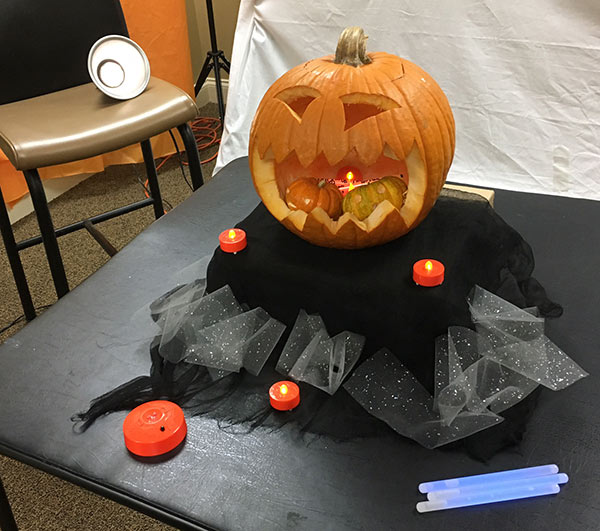
Ambient lighting set-up
Notice that we don’t have anything fancy going on here – just a low wattage lamp set down on a stool.
Next, notice the tea lights in the photo above. We’ve got a few placed in strategic spots in front of the pumpkin. This will help light up the outside of the pumpkin with a soft orange glow once we turn off the lights.
Finally, notice the large pumpkin strobe light and the glow sticks. These aren’t necessary for a great photo, but can take it to the next level. If you can enlist a helper, they can stand out of frame and hold the strobe light and/or the glow sticks to highlight more of the pumpkin. The best spot is usually from above and to the side, opposite your lamp.
Set up your shot
Once you’ve got your lighting figured out, it is time to take your shot. This is where your tripod comes in. The aim here is for steadiness, to eliminate blur. Cameras have trouble focusing in the dark, so we need to help out. If you don’t have a tripod, set up a steady chair or other surface for your camera.
You want your camera to be at “eye level” or slightly below your pumpkin. Mostly to avoid revealing any of your light sources inside the pumpkin, but also for an extra spooky composition!
We find it helpful to stack our pumpkins on top of a box that’s draped in dark Halloween netting. This gives us room for extra tea lights to light the pumpkin from below, but also adds a nice touch to the final result.
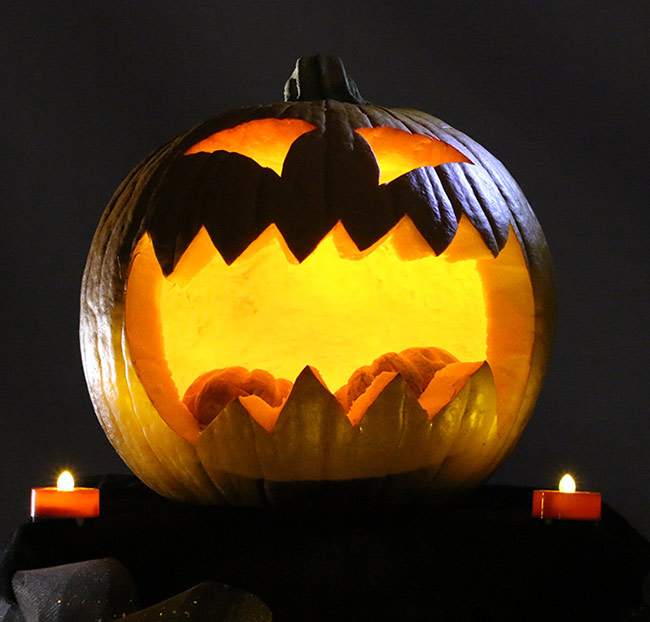
The final shot!
A note about your camera:
Feel free to use your phone, if you don’t have a fancy camera. However, you’ll want to see if you can slow down the shutter speed. This isn’t absolutely necessary; you can take a great pumpkin photo with standard camera settings. However, a longer “exposure” time allows you to get away with less ambient light. If you’re going to use your phone, go crazy with loading up the inside of your jack-o-lantern with extra lights, so you can get away with more lights for highlighting the outside of your pumpkin.