In late 2020, Google Analytics 4 (formerly App+Web) came into the spotlight. Before, you needed Firebase to track mobile apps and Universal Analytics to track websites. The capabilities of both platforms were combined into Google Analytics 4 (GA4). However, this is not the only benefit in using GA4 over previous versions. Improved reporting, event tracking and automation come standard in Google’s new release. Read our previous blog post, “Google Analytics 4 Better Than Universal Analytics?” for a full comparison. However, this article is for those who have been using Google Analytics and want to set up GA4 in their existing Google Analytics account.
Switch to Google Analytics 4 – A Two-Part Process
Google made the process of switching to Google Analytics 4 simple and convenient. There’s no need to make a new account, install software, or abandon your exiting Universal Analytics (UA). In fact, it’s recommended to keep your UA account running alongside your GA4 property. This will allow you to warm up to new the new version of Google Analytics at your own pace. Making the switch is broken into two main parts: using the GA4 Setup Assistant wizard and connecting GA4 to your website.
The GA4 Setup Assistant Wizard – Part 1
STEP 1: Open Google Analytics Account
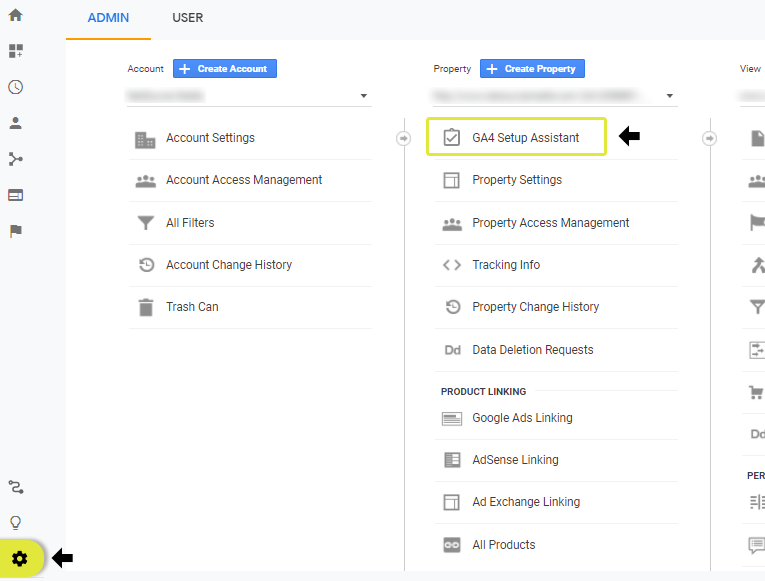
Before getting started, log into your Google Analytics account and follow these steps through the GA4 Setup Assistant. Click “Admin” or the icon shaped like a gear at the bottom of the left sidebar then, in the “Account” column, make sure you have the desired account selected. No need to change accounts if you only have one.
STEP 2: Use Google Analytics 4 Property Setup Assistant
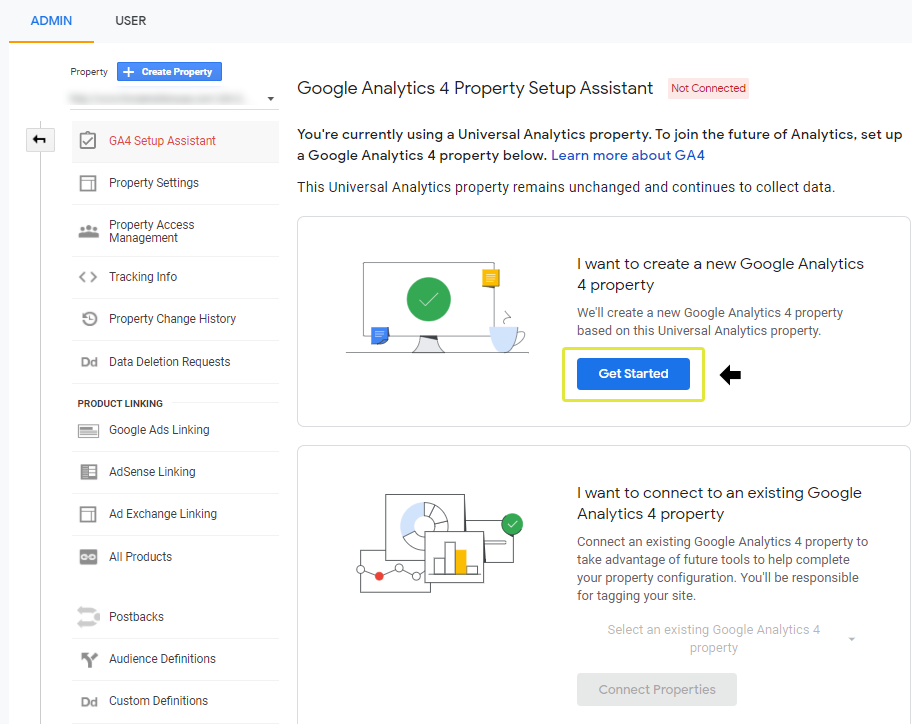
Click “GA4 Setup Assistant” on the top of the “Property” column. This will display an option to create a new GA4 Property or connect to an existing one. Since you don’t have a GA4 account set up already, click on the “Get Started’ button under the top/first option. This will take you to a wizard to create your GA4 property.
STEP 3: Create a New Google Analytics 4 Property
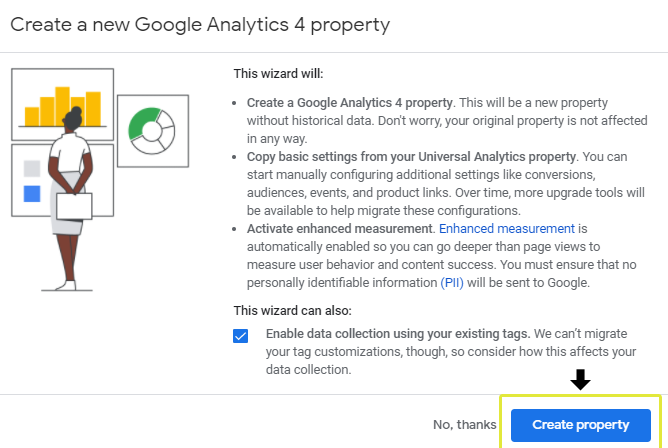
The next display will inform you that the setup wizard will create your GA4 property, copy basic settings from Universal Analytics, and enable “enhanced measurement,” which is unique to this version of analytics. Click the “Create property” button.
IMPORTANT NOTE:
What does “Enable data collection using your existing tags” mean? What if it’s NOT checked?
The checkbox will be checked by default if you are using Google Tag Manger (GTM) or “gtag.js” tag is on your site code. This means you can connect your new GA4 property through GTM as a tag to begin tracking data. The site code doesn’t have to be changed, and your existing GTM tags will be used.
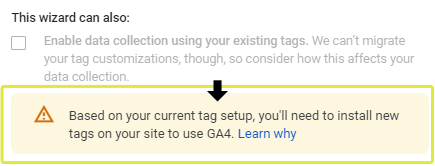
If you don’t have GTM set up, the checkbox will NOT be checked. Instead, you will see the option disabled with a caution message (see screenshot). Also, if your site is using an older Google Analytics header code (‘analytics.js’), or you are using a website builder/CMS (like WordPress, WIX, Squarespace, etc.), the checkbox will be unchecked. Given this scenario, you’ll need to add the analytics tracking code yourself to begin passing information to GA4. This will be explained in STEP 5.
STEP 4: Copy Google Analytics 4 Property Measurement ID
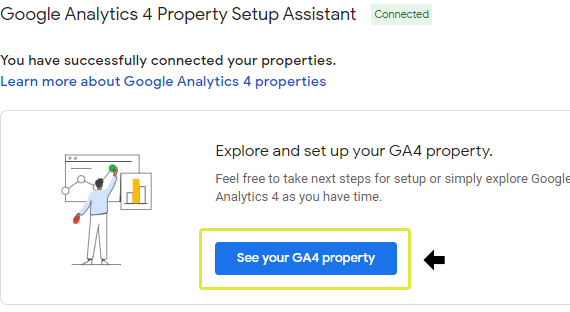
Now your GA4 property has been created! Click the “See your GA4 property” button to view your account and get your tracking code and measurement ID. This will be necessary to allow GA4 to begin collecting information. Next, we’ll connect your new Google Analytics 4 property to your website.
Connecting Google Analytics 4 to Your Website – Part 2
At this point, you should have created your new Google Analytics property through the GA4 Setup Assistant. From here, you’ll need to copy the measurement ID and use it to implement a tag in Google Tag Manager (GTM). GA4 will start collecting website data once the tag is created and submitted.
STEP 5 Copy Measurement ID in Web Stream (Continued from STEP 4)
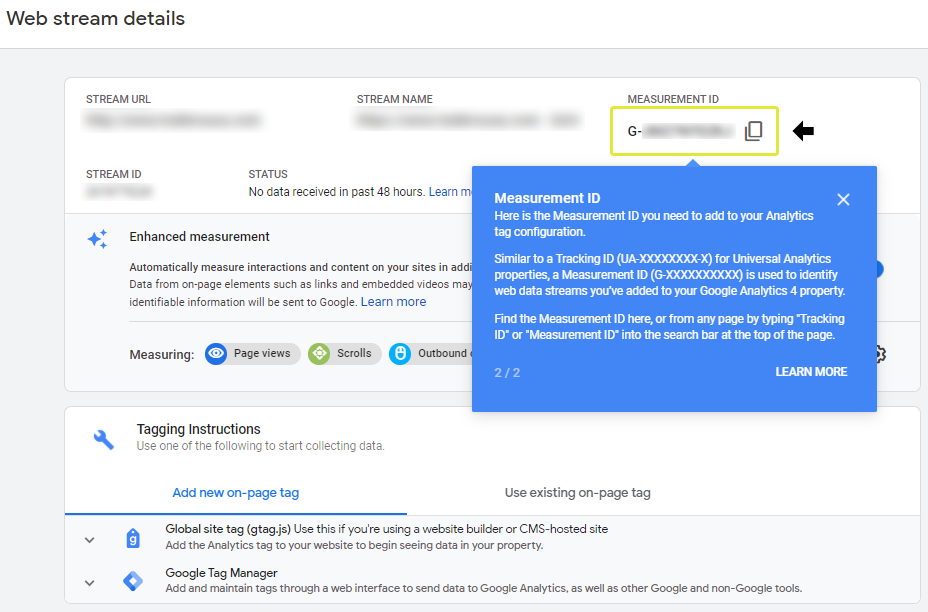
With your GA4 property open, click on “Data Streams” on the left-hand column or click the side arrow at the end of the row that says “Tag Installation.” The next screen will display your website data stream in the very first row of the table. Click on it. This will bring you the the screen pictured below with all of your tracking settings. Copy your measurement ID which looks like this G-XXXXXXXX where each X is a letter or number.
IMPORTANT NOTE: If you are not using Google Tag Manager (GTM) to connect your GA4 property to your website, click here to follow Google’s instructions for website builders or custom code situations. If you were shown that caution message from STEP 4, you’ll have to do things differently. DO NOT continue to STEP 6 UNLESS you’re using GTM.

STEP 6 Create GA4 Tag in GTM
Open your Google Tag Manager (GTM) and click to view the container with your Universal Analytics or the default container. Next, click on “New Tag” on the dashboard, or click “Tags” on the left sidebar menu, then click on the “New” button above your existing tags.
- First, add a title. Keep it short and include “GA4” in the name to distinguish it later. Some examples are “GA4,” “GA4 Tag,” “Google Analytics 4,” or anything similar.
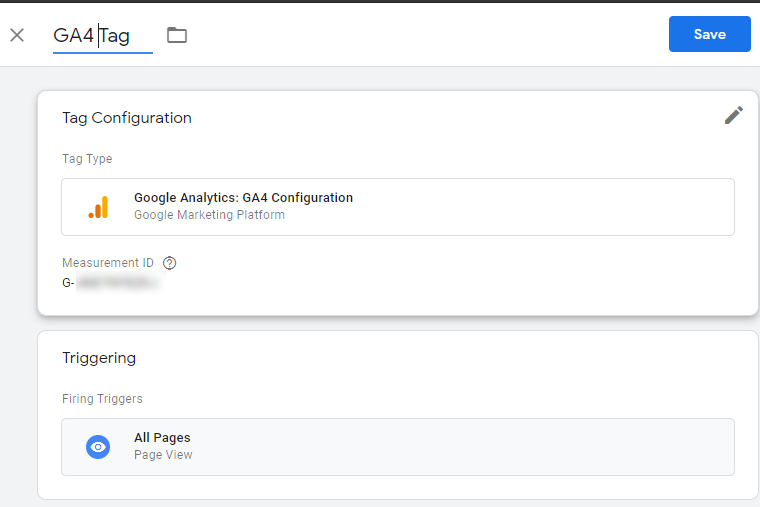
- Secondly, click the “Tag Configuration” box (or pencil icon at the top right of the box) to edit the settings. Select “Google Analytics: GA4 Configuration” as the option for tag type. Paste the measurement ID you copied from STEP 5 in the box labled “Measurement ID“
- Thirdly, click on the the box labeled “Triggering” and choose “All Pages” as the trigger. If your Tag Configuration and Triggering looks like the image below, click the “Save” button to create your tag.
STEP 7 – Test And Publish GTM Version
Now that you’ve created your GA4 tag, you can test it to ensure it’s working.
1) Make sure you are on your main Google Tag Manager (GTM) dashboard or just click on “Overview” in the left sidebar menu. Once there, click on the Preview button at the top-right of the dashboard.
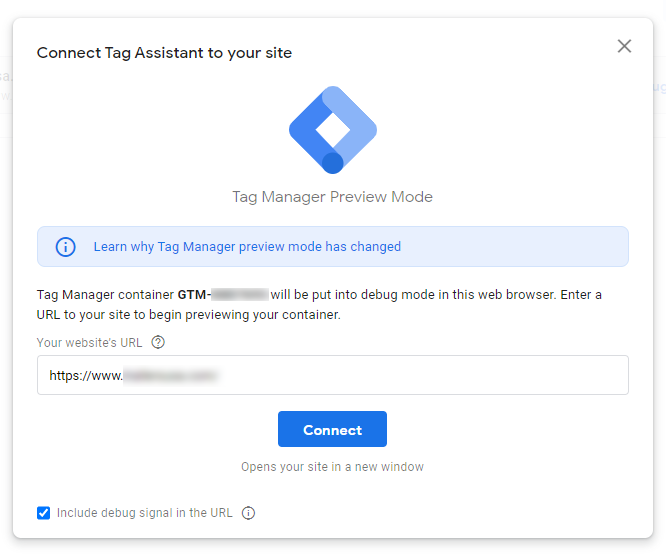
2) A popup window will appear. The textbox labeled “Your website’s URL” should be prefilled with your website address. If not, add it there. Click the “Continue” button.
Your website will appear in a new window, which you can close out. When you do, you’ll see the “Tag Assistant” popup. Click “Continue” on that popup.
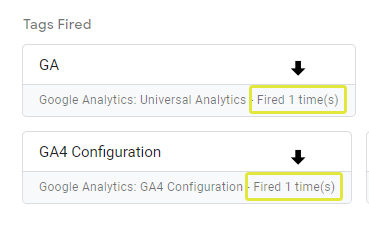
3) After that you should see your GA4 tag with a confirmation that it fired. If you have a Universal Analytics tag, you’ll see that and your other tags firing normally as before. Once your GA4 tag fires, click on the “Publish” button and GTM will begin passing website information to your GA4 property.
Viewing Your Google Analytics 4 Property
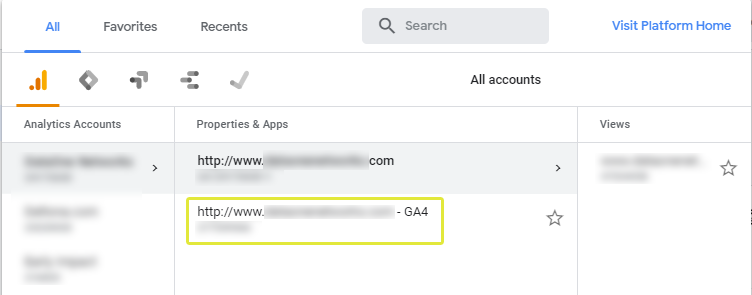
Congratulations, you made it! Once your GA4 property is created, you will be able to see it next to your former Universal Analytics account in your admin view. You may go back and forth as often as you need to and neither property will interfere with the other. We recommend at this point clicking around GA4 and navigating through the menus and options. Not sure what the new Google Analytics has to offer? Click here to read our article of key features.
Not Tracking with Google Analytics 4?
GA4 will keep you ahead of the curve in both technology and compliance. Google already announced that Chrome will stop supporting third-party cookies in a few years. Other browsers will follow. We can help you make the switch to GA4 so you can get the most out of your analytics.
